Another beautiful fall day here in Michigan!! I actually spent a day outdoors this week cleaning out the pond shed and organizing it for the winter. I hadn't been inside the shed since the last swimming party we had, so I was shocked to see how many swimming toys were left behind. So now I have to go out and buy another huge plastic tote just for the child life jackets. It also took a lot more time this year because I had to release the air out of probably 10 more inflatable toys. Those go in a tote also because the country varmints seem to like plastic (plus it keeps dirt and cobwebs off the toys, which I can't stand to touch in the spring). Bottom line, I have enough water toys for next year!!
So let's get on to what you came here for -- stamping projects!! I wanted to create a few more cards using Stampin' Up's awesome
Circle and Label Thinlits' Dies and try out a new horizontal cut I saw on Angie Leach's blog. Here are two horizontal cards (both different sizes) that I came up with:
 |
| I thought I had all the Christmas stamps I needed for the year (and more), but one of my clients saw a swap card using this stamp set, and I decided I should get it because it would make a great birthday card stamp. Supplies: Wishing You Stamp Set; Season of Style Designer Series Paper Pack; Whisper White and Crumb Cake Card Stock; Cherry Cobbler Seam Binding Ribbon; Label Thinlits Die; Rhinestone Basic Jewels; Cherry Cobbler, Garden Green, and Crumb Cake Markers, and Dimensionals. |
 |
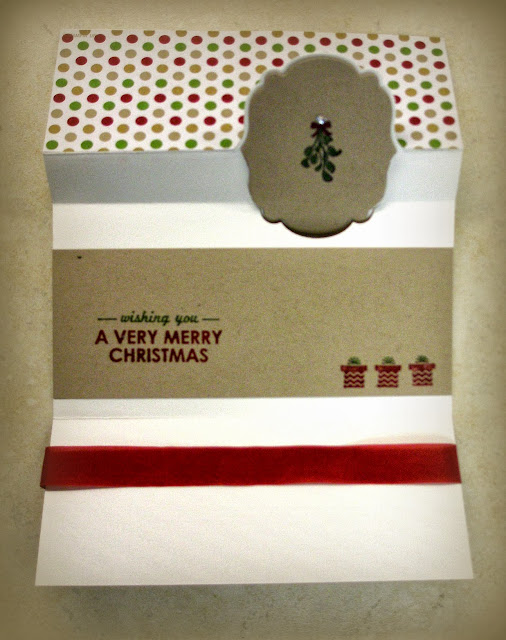
| Here it is unfolded. I used the Fun With Christmas Mistletoe Stamp on the label. The Whisper White Card Stock cut size was 5 1/2" x 8 1/4". When you run it through the Big Shot, you'll have the left side of the card stock under the Label Card Thinlit, and the right side of the card stock on top of the Thinlit (not being cut). |
 |
| And of course I had to create a vintage card (it has been way too long). I have had the Lovely Romance Stamp Set since June (on my first order from the new catalog), and I can't believe I had not inked it up before. It really is a beautiful stamp set. Supplies: Label Card Thinlits Dies; Lovely Romance Stamp Set; Soho Subway Designer Series Paper; Island Indigo and Crumb Cake Card Stock (spritzed with Island Indigo and sponged with Garden Green and Summer Starfruit Ink); Tea Lace Paper Doily; Creped Filter Paper (spritzed with Stampin' Spritzer using Island Indigo and Summer Starfruit Ink Refills); Blossom Punch; Soft Suede Ink (sponged around Crumb Cake panel); Pearl Basic Jewels; and Antique Brads (center of flower). |
 |
Here is the card opened. The stamped medallion was heat embossed with Early Espresso Embossing Powder. The pearls were colored with a yellow permanent marker.
How To Make A Horizontal Card—To create a card that fits in a Medium (standard A2-size) envelope, start with card stock that is 7" x 4-1/4". When you run it through the Big Shot, you'll have the left side of the card stock under the Circle Card Thinlit, and the right side of the card stock on top of the Thinlit (not being cut). |
Let me know what you think of the horizontal style.
Until next time,
Sandi


Gorgeous Sandi!! Loving the horizontal thinlet card!
ReplyDeleteWhat beautiful cards; plus turning the card on it's side. Keep up the good work.
ReplyDelete