
Before the tutorial, I want to thank Lynn Pratt, www.stampndesign.blogspot.com, for sharing her tutorial on her blog (post dated: January 22, 2012). I did mine a little different, so I created instructions based on how I made my roses. Please check her blog for her down loadable directions (and comment your thanks), as you can look at both to decide how you want to make your roses. So here we go folks (please remember, you can right-click on the pictures to open in another tab/window a larger picture):
 |
| Picture from Previous Post of my roses done for SAB Event |
Tutorial: Card Stock Roses Using Stampin’ Up Tasteful Trim Bigz XL Big Shot Die -- By Sandi Dailey
Product Used | |
Cardstock: | 12" x 12" Blushing Bride and Always Artichoke Scraps |
Ink: | Blushing Bride Classic Ink |
Punches: | 5-Petal Flower and Blossom Petals Builder Punches |
Big Shot: | Tasteful Trim Bigz XL Die |
Accessories: | Blushing Bride Smooch Spritz; Tombow Liquid Glue; Simply Scoring Stylus; Mat Pack; Sponge; wooden skewer (think Shish-Kabob); Water Misting Bottle; Bone Folder; Paper Piercer or 1/8" hole punch |
Directions (To print A PDF click on the "print" button below):
 |
|
 |
| 3. Sponge edges of die cut card stock with Blushing Bride Classic Ink on sponge. |
 |
4. Run your Bone Folder across the die cuts a couple of times to break down fibers (it will curl). 5. Put the two die cuts on top of each other, as shown, and apply a little Tombow to glue the top edge together. |
 |
| 6. Let it dry, then start braiding by crossing them over each other (instead of 3 strands, you will only have 2 strands to braid).The card stock will curl as you braid. |
 |
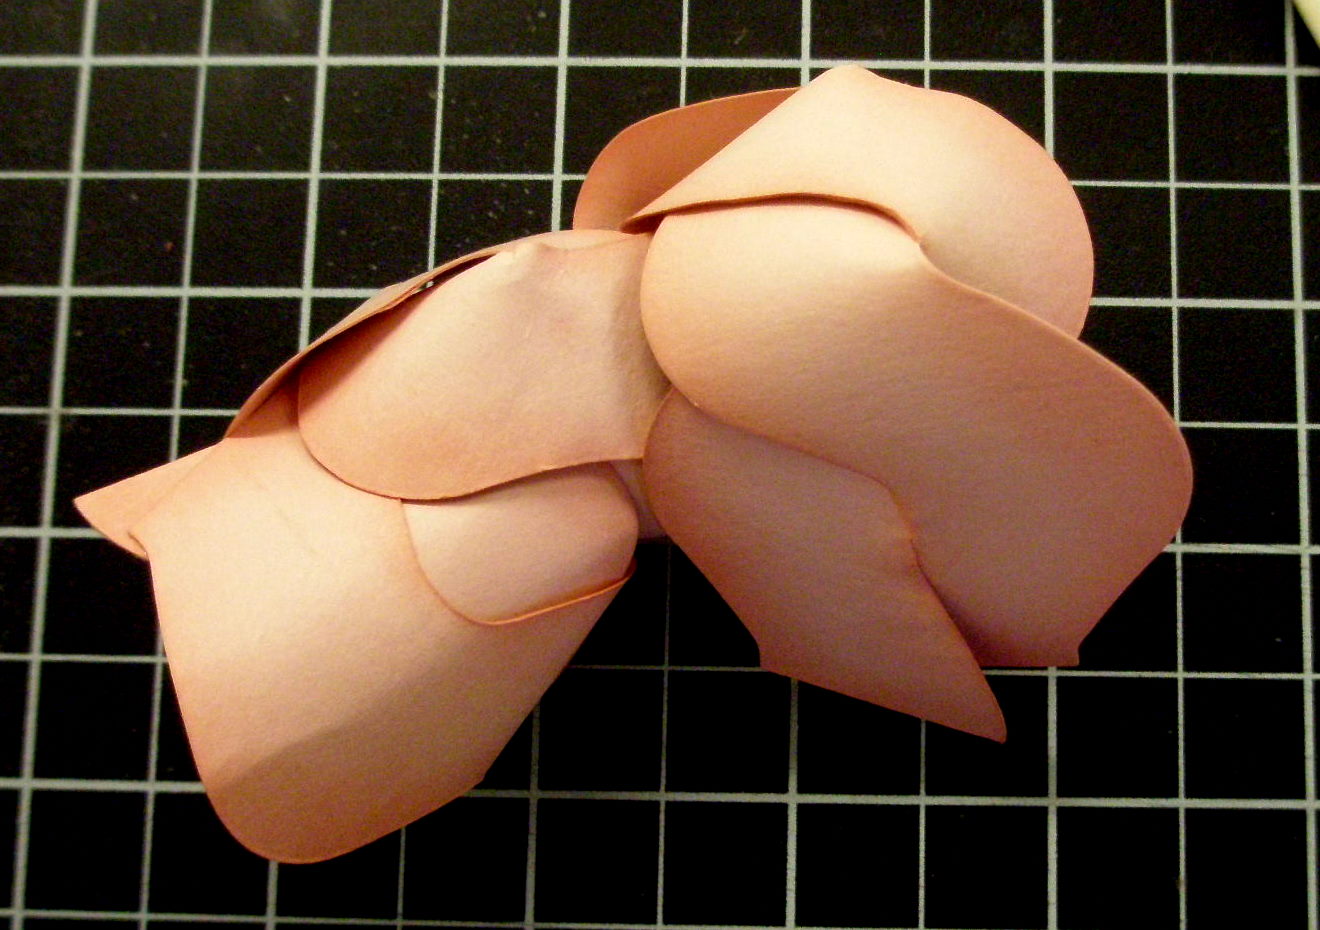
7. After it is all braided, start winding/rolling it up. I started with a tight roll at first, and then loosened a bit to give it the look of a rose not fully bloomed. You can roll it as loose or tight as you want your rose to look like. |
 |
8. When you get to the end, glue the strips together, trim the end edges, and glue end to body of rose with Tombow. It will NOT look pretty folks, but should resemble a rose bud a little – you are not done yet, so don’t give up!! I used my Simply Scored Stylus to put under the petals to shape it better. |
 |
| 9. Mist with water and curl the edges of the petals – mess with it until you get the look you want. Don’t worry if it rips a little, stuff happens, but it will still look good. Let it dry, or use Heat Tool to dry if you are in a hurry (like I am). 10. Mist with Blushing Bride Smooch Spritz (I like a real good coat of the smooch on mine). NOTE: I forgot to apply my Smooch Spritz, so did it at the end and wiped away smooch on leaves (boo boos are fixable). |
 |
| 11. Punch 5 leaves using the Blossom Builder Punch and one flower from the 5-Petal Flower Punch in Always Artichoke Card Stock. |
 |
| 12. Using Tombow Glue, attach the leaves to the 5-Petal Flower (see picture). |
 |
| 13. Punch a hole in the middle. Tip: I misted mine with water and shaped it a little before gluing to the rose (see picture). |
 |
| 14. Glue leaves to the bottom of your rose – don’t put glue on the upper-top of the leaves so you can curl these down a little – center the punched hole over the hole on the bottom of your rose. This is how it looks after attaching leaves (but yours should have Blushing Bride Smooch Spritz on it). |
 |
| 15. Use some ¼" strips Always Artichoke Card Stock to wrap around your skewer. It works much better if you break down the fibers of the card stock with your bone folder first (it will curl). |
 |
| 16. You can either apply Tombow Glue to the skewer or the card stock to adhere. TIP: Keep a wet rag next to you so you can clean your fingers from runoff glue. |
 |
| 17. Punch 3 of the big blossoms from the Blossom Petals Builder Punch in Always Artichoke Card Stock and trim the top edges (see picture). |
 |
| 18. Use the Simply Scoring Stylus with the Paper Piercing Mat (from the Mat Pack) to emboss some veins on your leaves. |
 |
| 19. Attach the leaves to the rose stem using Tombow Glue. (Finally got that smooch on mine!!) |
 |
| And here is my bouquet of roses!! Notice they are all different sizes (i.e., stages of bloom), based on how tight I rolled my petal strips. |
I hope you like these half as much as I do!! They make such a beautiful centerpiece on my bar. The instructions are long; but trust me, the rose takes about 5 minutes to make and wrapping the wooden skewer takes a little longer. I can't wait to see samples of your roses -- please share!!
Until next time,
Sandi
"For we walk by faith, not by sight." -- II Corinthians 5:7
"Lord, give me the courage to walk out in faith to answer your call." -- Dolphus Weary


Yours look great too! These are so much fun to make! Thanks for linking me!
ReplyDeleteDrop dead gorgeous! TFS
ReplyDeleteI cant wait to try them!! thanks for easy to understand instructions!
ReplyDeleteWow, I thought each petal was an individual. I'm so glad I ordered the Tasteful Trim Die. Thanks for sharing!!
ReplyDeleteMarsha
WOW.
ReplyDeletethese are stunning! I would NEVER have guessed the tasteful trim die. Great job--they look so real!
they look great sandi
ReplyDeleteSandi, U did a good tutorial. I seen these in person so I know the pictures don't come close to how they look in real life. TFS
ReplyDeleteThank you for all the tips Sandi, they are very helpful and easy to follow. I am sure that I will have no trouble following them. Cannot wait to give it a try but have to wait until I order some smooch. This will have to be something I will put down as a future class project for sure.
ReplyDelete