
Until next time,
Sandi
"Blessed be God who refused me not my prayer and His kindness." --- Psalm 66:20

 |
| Watercolor using the "Peaceful Place Stamp Set"; colored with SU Watercolor Pencils, misted with Frosted White Shimmer Paint; Cajun Craze, Old Olive, and Very Vanilla Cardstock; and Decorative Ribbon & Triple Banner Punches. |
 |
| Used the "Beautiful Blizzard Stamp Set and Blizzard Thinlits Die"; Soft Sea Foam Cardstock and Ink; and Whisper White and Silver Cardstock/Paper. |
 |
| I CASEd this card (changing the background) from a swap card I received -- I thought it was just the cutest card!! I used the "Playful Backgrounds Stamp Set"; Thick Whisper White and Basic Black Cardstock; Large Letters Framelits; and Cat Punch. |
 |
| I used the "Beautiful Baubles Stamp Set and Detailed Baubles Thinlits Dies"; Real Red and Whisper White Cardstock, Under the Mistletoe Designer Series Paper, and Silver Foil Paper; and 1/8th" Sheer Whisper White Ribbon. |
 |
| I so loved using the new Stampin' Blends to color the soon discontinued Petal Passion Designer Series Paper. I only had a small piece of this particular design left and it was perfect for creating Mother's Day cards for my daughters'. |
 |
| Same card, just another piece of the designer paper -- I loved doing these. |
 |
I loved how the Painted With Love Specialty Designer Pager added "style" to the You've Got Style Stamp Set. This is another tri-fold card I made for my sister's birthday this month.
|
 |
| This is the second fold of the birthday card. |
 |
| This is the back fold of the birthday card. |
 |
| I had to make a quick graduation card for my granddaughter, who love vintage/shabby chic. So of course I pulled out my Paper Pumpkin Kit from last month to make the perfect card for her. This is the envelope. |
 |
| This is the matching notecard I made for the inside of the envelope -- perfect to hold her gift money. |
 |
Actually, I had a hard time using this beautiful Share What You Love Specialty Designer Paper because it is so beautiful and is brand new from the Share What You Love promotion going on for customers until the end of May -- but coming in the new catalog. I call this a Mini Buckle Purse to hold 8 notecards and envelopes -- it is so beautiful in person. I used the new Share What You Love Stamp Set on all of it, except the "Happy Birthday" sentiment that comes from the Happy Birthday Gorgeous Stamp Set being carried over to the new catalog.
|
 |
| I had so much fun creating this Tri-Fold card, using the retiring Painted With Love Specialty Designer Series Paper, the You've Got Style Stamp Set (carrying over to the new catalog), and Blender Pens. |
 |
| Here are pictures of the matching envelope, the first fold on the front of the card, the second fold in the center, and the back fold. This card was made in less than 5 minutes and 5 more minutes coloring the front. |
 |
| Here is another sample of a Tri-Fold Card using the new Share What You Love Stamp Set and the retiring Sweet Soiree Specialty Designer Series Paper. |
 |
| Here is what the inside folds look like. |
 |
| I love this set, using the Birthday Delivery Stamp Set, the matching Birthday Friends Framelits, and Birthday Memories Designer Series Paper. I purchased the entire suite for my kid's and grandchildren's scrapbooking albums -- plus it makes such cute cards!! A must-have purchase before it retires!! |
 |
| I made this card for my daughters' birthdays, using the Pocketful of Sunshine Stamp Set, coordinating Pocket Framelit Dies, and the Petal Garden and Tuti-Frutti Designer Series Paper Packs. The Pocketful of Sunshine Stamp Set and coordinating Framelit Dies will not be retiring, but will no longer be sold as a "bundle," with a 10% discount (you will pay full price for both). The sentiment is from the "Happy Birthday Gorgeous Stamp Set" and carried over to the new catalog. (The buttons are retired SU product colored with the new Light Rich Razzleberry Stampin' Blends to match the Sweet Sugerplum Cardstock retiring.) |
 |
| Close-up of the tiny envelope I made to fit the pocket, using the Petal Garden Designer Series Paper Stack (retiring). |
 |
| Close-up of the back of the envelope and gift money wrapped in belly band. |
 |
| Inside of the card (had to cover up my hand-written note), using the retiring Great Big Greetings Stamp Set and flower from the Happy Birthday Gorgeous Stamp Set. |
 |
| Along with the Brusho Crystal Color for the background, I used the new Waterfront Stamp Set (embossed with Black Embossing Powder) for this card. |
 |
| This was my Easter card to my Pastor, using the new Hold on to Hope Stamp Set, Matching Framelits, and Gold Embossing Powder. |
 |
| Easter card for elderly members at my church using Stampin' Up!'s Note Cards & Envelopes, the new You're Inspiring Stamp Set, and the Bow Builder Punch for the sentiment. (Inside sentiment is from the Hold on to Hope Stamp Set.) |
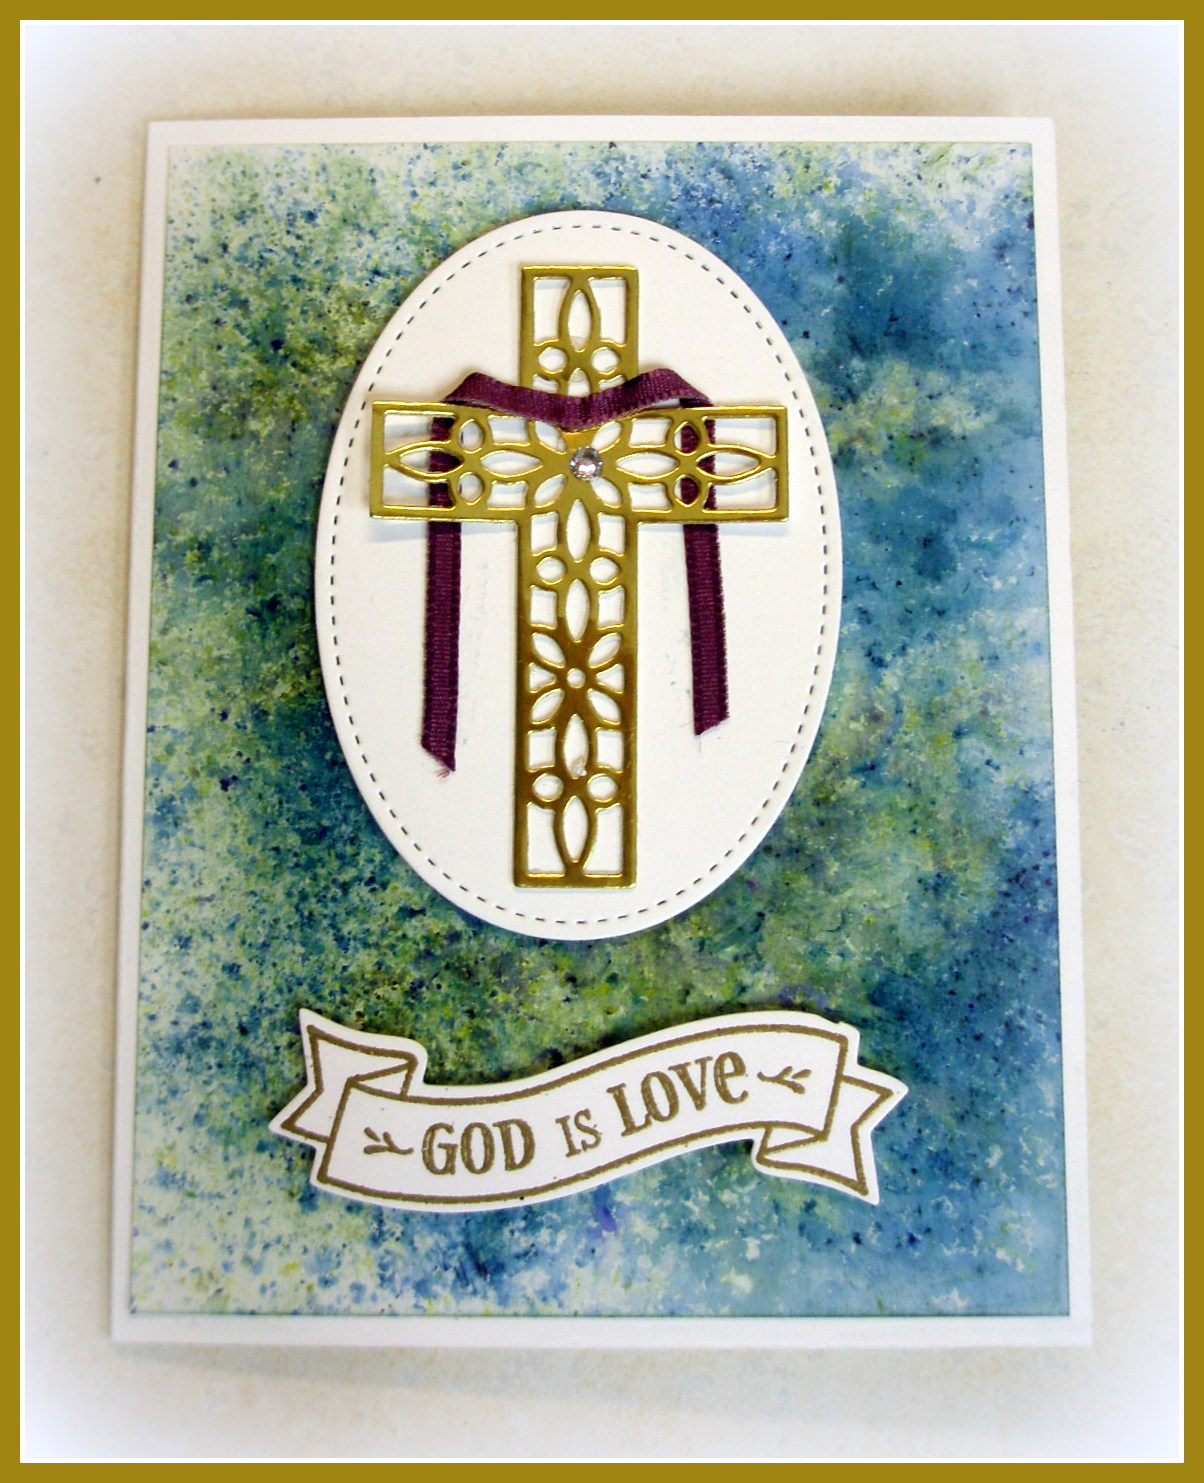 |
| First Communion card using the Brusho Crystal Color for the background, Hold on to Hope Stamp Set and matching Framelits, and Gold Embossing Powder. |
 |
| The new SAB Heartfelt Blooms Stamp Set, using the cling wrap technique. |
 |
| The new SAB Heartfelt Blooms Stamp Set, using the Stampin' Blends to color. |
 |
| A swap card I made using the "Heartland" Stamp Set and SU's markers to color -- I love my markers also, but this card would have been awesome if I would have used my new Stampin' Blends. |

